| This article is a stub. You can help Mordhau Wiki by expanding it. |
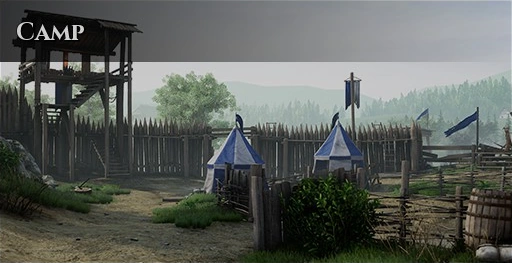
Camp is a map in Mordhau. It consists of two large open war camps on opposite ends of a barren battlefield, which is littered with various fortifications and siege towers. There is also a small river running through the middle of the map.
Occasionally, a war-horn can be heard being blown in the distance. When this happens, a group of trebuchets positioned behind the red camp will launch a barrage of flaming boulders at the battlefield, landing in random locations and igniting the ground similarly to fire bombs. Players are advised to keep an eye on the trajectory of these projectiles when hearing the war-horn as to avoid falling victim to them.
Camp is also used in the combat tutorial.
Areas / Landmarks[ | ]
Show a gallery of notable landmarks and locations.
Pictures coming after written descriptions for other maps.
Iron Company Spawn[ | ]
The Iron Company's spawn is a war camp littered with tents and piles of wood planks. There is a large wooden wall surrounding it. Mercenaries spawn on a wooden platform in the back of the camp. There are two main exits, a large opening in the wall directly in front of the spawn platform, and a ramp leading towards Point A. There is an extension of the front of the wall, serving as an enclosed space for the barrel cart to be pushed through. Behind the spawn platform, there is an open field with a large number of tents, siege towers and trebuchets.
The Hunting Grounds[ | ]
The Hunting Grounds consist of everything outside the walls of Iron Company's camp and before the three siege towers. The point itself is surrounded by two shacks, one having been destroyed and lit on fire. The destroyed shack contains a supply box. The front of the point has a cart, which, when combined with frontline buildables, creates a full wall around the point. To the rear of the point itself, there are a number of carts, spike walls, and a small fence. The Iron Company side of the map border is drawn by a giant, impenetrable spike wall. Aside from the point, there is a ballista in front of the camp, and an empty dirt path that leads into the camp.
The River[ | ]
The River (point) is after the river (landmark) and has a rough border drawn by the three standing siege towers. Aside from these three towers, a felled tower is at the side of the point. This felled tower contains a supply box, and a ramp to get on top of it. On the other side of the point there is a small wooden platform. Near the central siege tower, there is a lone tree on a hill. Aside from these and a few spike walls pointing towards the river, The River is pretty barren.
The Stables[ | ]
This is everything after the camp and before the river (not the objective, the landmark). The main area is the Stables objective, which is a clear patch of dirt surrounded by a stable and an accessible tower. Directly ahead of the stable, and next to the tower, there is a felled siege tower with two boards at its entrance. There is also a wall to the front and right of the point, which contains large stones and similar platforms to the Free Guard's spawn. At the right edge of the map there is another tower. Both of the towers have a supply box at their base. There are "walls" of wooden spikes jutting out towards the river in a number of places at this point.
Free Guard Spawn[ | ]
Everywhere before the Stables frontline objective. This area is a walled-off camp with an assortment of tents, weapon racks, and other miscellaneous decorations. Its primary landmark is a smaller, fenced in area in the center of the camp that is often used in duel servers. The outer walls of the camp have a platform on their inner side and three towers, providing the Free Guard ample space for archers and mechanics. The center tower has a supply box within it. There are two other towers to either side of the camp, but these are inaccessible. The walls also have two doors, one to either side, and a ramp leading out of the camp, all of which can be used by either side. Behind the camp itself, and up a slight incline, there are more tents, carts, and, quite a distance off, an unreachable castle.
Other/Non-Major Areas[ | ]
To the two sides of the map that aren't Free guard or Iron Company's spawns there is a forest and a small farming town. Both of these are purely cosmetic, and protected by an OOB kill-wall.
Secrets[ | ]
Located to the left of the Free Guard spawn just outside of the gate, a tribute to TotalBiscuit can be found.
Game Modes[ | ]
It supports the following gamemodes:
Frontline[ | ]
Camp's frontline consists of three points and an objective at each spawn.
Red Spawn[ | ]
Red's Spawn has no changes for frontline. In its original variant blue can win early by pushing the barrel cart into the camp if they have secured The Hunting Grounds.
The Hunting Grounds[ | ]
The Hunting Grounds have one red palisade, one red spike wall, one blue spike wall, and one blue sandbag wall. There is no requirement for red to capture this point. Blue must deliver two explosive barrels to each of the three siege towers to capture this point.
The River[ | ]
The River has three red sandbag walls and two blue sandbag walls. There are no requirements for either side to capture this point.
The Stables[ | ]
The stables have one red spike wall, one red sandbag wall, one blue spike wall, and one blue sandbag wall. Red must push a cart full of torches to blue's spawn to be able to capture this point. Blue has no requirements.
Blue Spawn[ | ]
Blue's spawn has no changes for frontlines. In its original variant, red can win early by burning blue's tents if they have secured The Stables.
Top-Down Map:

Map Name: FL_Camp
Invasion[ | ]
Blue Team Variant[ | ]
Description
Map Name: INV_Camp_1
Skirmish[ | ]
Description
Map Name: SKM_Camp
64 Player Variant[ | ]
Description
Map Name: SKM_Camp_64
Team Deathmatch[ | ]
Description
Map Name: TDM_Camp
64 Player Variant[ | ]
Description
Map Name: TDM_Camp_64
Deathmatch[ | ]
Description
Map Name: FFA_Camp
Horde[ | ]
Insert an overview of the Horde item locations, chest locations, known good spots and strategies.
Strategies:
The map is very open allowing bows to target columns of bots.
Map Name: HRD_Camp
Sword game[ | ]
Description
Map Name: SG_Camp